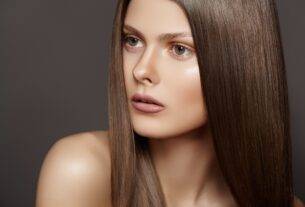
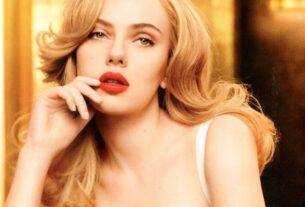
The weekend is coming closer! And I’m sure most of you are planning to go party hopping! Who doesn’t like attending parties eh! Okay enough of the exclamation marks. Time to get straight to business. Today I’m going to share with you two of my favorite makeup looks for both traditional and western outfits. When you have to attend so many parties back-to-back, you tend to worry about looking the same in all of them. Nope. That won’t do. So why not try these two super easy looks this weekend? Once you ace your base makeup routine, achieving these beautiful party makeup looks is just a few steps away! So here we go! Sorry about the exclamation marks again.
Makeup for western dresses (gowns):
If you’re headed to a fancy restaurant, a cocktail party or your BFFs pre-wedding bash, you may want to wear elaborate dresses or bright flowy gowns. So here’s a look you could try.
Step 1: Step one is always getting the base right. This tutorial will help you out:
Important tip: Now that you’ve nailed your base makeup, it’s time to proceed with the finer nuances. Since you’re going to wear a red dress, bear in mind that you need to stay away from bright colours. Choose a palette in nude or neutral shades. Always do your eye makeup before your cheeks or lips as you can tone them down or lift them up later. But if your eye makeup has gone wrong, it’s Dooms Day.
Step 2: So let’s begin with the eyes! Apply some concealer on your eyelid so that the eye shadow stays put. This look is going to be neutral so a brown smokey eye is perfect for it! Start with a dark brown eye shadow and using an eye shadow brush, apply it close to your lash line first and then spread the rest of it on your entire eyelid just till the crease.
Step 3: You may notice some harsh edges on your eyelid after step two but don’t worry about them as you’ll be smudging them off in this step. Pick a lighter brown eye shadow on your brush and gently apply it in your crease smudging out the harsh edges as you go. Notice how your eye immediately looks softened?
Step 4: This would be the last step that you need to do for a smokey eye (apart from the liner and mascara of course!). Before you begin adding the finishing touches to your smokey eye, use a fluffy blending brush and blend your eye shadows well. Then finally, pick up a nude shade that is very close to your skin tone and work your way into the crease and above it. Buff out any harsh lines and soften your smokey eye all over.
Step 5: Now for the fun element! Just because it’s festive season, a little bit of glitter won’t hurt anyone right? To amp-up the glam quotient of this makeup look, apply some brown glitter only on the centre of your eye lids and you’re done! Finish your eye makeup with a dash of mascara and your favourite eye liner. Here’s another great tutorial for eyeliner.
Step 6: Eyes are done! Now’s the time for the rest of your face; and you don’t really need to do much. The same rule applies to the cheeks and lips as well. Neutral is better that pigments. So opt for your natural blush that you like to wear every day. Swipe on your favourite nude lipstick that compliments your skin well. Voila!
Makeup for Indian dresses or saris:
Not all of us have the bomb figure to carry a gown or a mini dress; but we Indians sure as hell have the killer looks that you need to wear a sari. The Indian pear-shaped figure looks beautiful in a sari or an Anarkali dress; but wearing it without makeup just doesn’t cut it. So why not try this look
Step 1: Indians have a warm skin tone that’s such a blessing because we can easily wear most of the colours on our faces and look like divas every single day. Thank God for that olive skin! Repeat the first step mentioned above.
Step 2: Moving on to the eyes, apply concealer around your eyes and use a base eye shadow in the lightest pigmented colour that you have. A very light champagne pink colour has been used in this tutorial, but you can use whatever colour you have; just make sure you stick to the same family. Simply apply it all over your lid, except for the crease and above.
Step 3: Highlight your brow bone to lift up your eyes. Then apply a second eye shadow in a brick red-meets-brown shade over the first one, sticking close to the inner corner of your eye. Then go over the same with another bright shade (purple has been used here) to balance it out with the first colour that you applied.
Step 4: Fill in the rest of the eyelid (centre and outer corner) with a mocha brown eye shadow. And then use a softer brown eye shadow in the crease as a transition colour. Finish with eye liner and loads and loads of mascara!
Step 5: Since the eyes are so colourful, the lips will again be neutral. Choose a lipstick that matches your natural lip colour and apply a generous amount, before blotting it with tissue so that it sets. You can apply a bronze to your cheeks and under the jaw line, but that’s optional. So there you are the most beautiful Indian makeup look you have ever seen!


